

Tip on Mixing in GarageBand
Jeffrey Rucker’s Chaotic Methods
November 7, 2019
GarageBand is an audio creation studio software with abundant tools and settings for iOS devices. It contains various instruments and presets for both guitar and vocal recording. With all of its features and simplistic modern design, GarageBand is easy to use and record with for quality audio.
You can use GarageBand to produce instrumentals, record vocals, and even mix those sounds to fulfill your musical desires. After that, you can share your track with the world or just keep it for personal enjoyment. I myself use GarageBand to record and mix songs. My tracks have even gone as far as reaching streaming platforms like Apple Music, Spotify, and etc. Some of my practices include:
- “Paper Chaser” (Prod. Secret Stash)
- “Extended Voicemail” (Prod. Unicorn Waves)
- “Uno’s Return” (Prod. Homage)
- “Bamboo (feat. Mikke Tenna & CFO Hustle)” [Prod. Unicorn Waves]
I understand that a vast amount of people would like to start making music themselves, and most experienced musicians would like to expand their production skills. So, I’d like to explain some fundamentals of GarageBand that will make your audio files sound livelier.
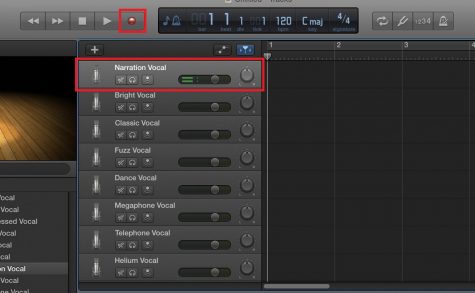 First, let’s talk about GarageBand’s template presets. Within the sound library of GarageBand, there are several vocal settings that can be enabled before or after you record. These settings use various plugins to create different vocal effects. These presets can quickly make your audio sound like a monster, a phone call, and other ideal vocal scenarios. Other presets can also brighten or even distort your voice.
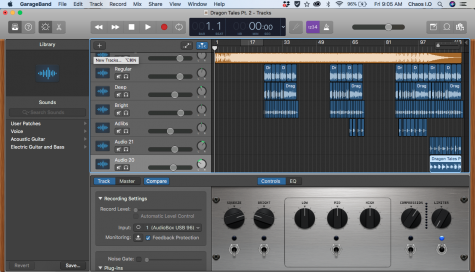
So, after you record your audio you’ll see blue lines appear called regions. The lines will appear orange if your audio is imported. Here’s a screenshot of a song that I am currently working on for reference.
Something that I personally do is chop up my blue regions, so that all of the wavelengths match up. However, do this with caution, if at all, because imprecise audio cuts can cause clipping.
Mixing can be done with monitor speakers, headphones, or anything that produces sound, even cars. I use two pairs of headphones: Sennheiser HD 280 Pros & Solo HD Beats by Dre. The Sennheiser headphones output pure audio the way that it’s supposed to sound. Beats by Dre on the other hand, tweaks all audio within the headphones to release slightly sweeter sounds. So, they don’t give the most accurate output, but they are a great pair of reference headphones because many people listen to music with Beats and relative headphones. Remember to listen to your tracks repeatedly in different ways (phone speakers, headphones, car speakers, etc.) to find a proper balance in your mixing.
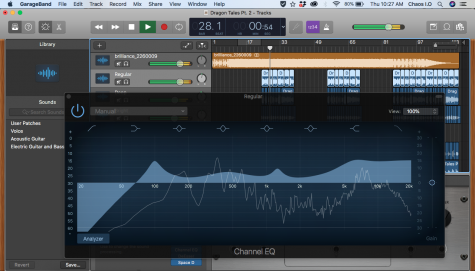 The first plugin that I use in my mixing process is the Channel EQ. Channel EQs have eight colored-coded points arranged from low(bass) to high(treble). These points can be independently shifted to shape the overall sound of selected regions. All voices are different, so exact settings within plugins are all based on preference. Drag the points and play around with them until you notice what sounds good and what doesn’t. Keep in mind not to “overdo it”, and accidentally make your regions too powerful.
I next go into my other plugins like the compressor. After turning on my compressor, I increase my attack which increases the speed of compression. Therefore, my vocals are nicely compressed while my annunciation is clear. The DeEsser basically softens the “S” sounds that I make while singing or rapping.
Unless I’m experimenting with a song, one the final plugins I use comes from reverb. Reverb is the decay of numerous reflections heard after an initial sound. This is mixing’s most powerful effect. It provides a sense of space and distance in relation to the listener. Within the reverb plugin folder, I utilize space designer. Space designer focuses on the length of reverb, volume of your actual voice, and the output volume of the reverb.
 Inside a song, several changes may occur. Changes in tempo, volumes, and more take place. So, your plugins should match or complement these changes. This is where automation comes in. Automation allows you to create different levels of volume, panning, echo, and other settings within your song at certain points.
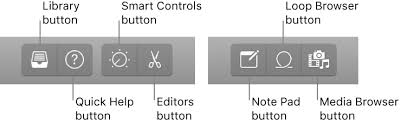 If you need some refreshers in the midst of mixing, GarageBand has a Quick Help feature that you can turn on and off.
Moving forward, continue to explore and play with the plugins of GarageBand. Channel EQs, compressors, DeEssers, and space designers are just typical plugins that I use. There are many different plugins that are worthy for experimentation. Be an active listener to your favorite songs to see if you can identify the effects that other artists use. Keep a healthy balance of writing your own songs and listening to others’ tracks to stay inspired with music. With all that being said, keep experiencing and keep creating the joys of music.